Post by mralgae on Mar 31, 2008 0:48:27 GMT -1
Extra light fitting to a Rio 240L tank.
Many people are asking how to upgrade their lighting in various tanks. Here I hope to help those who wish to add extra light tubes by showing how I added two extra tubes two my 240. I use the standard jewel I bar (T8s) and two extra T8 tubes and fittings.
This can also be done if you want to use T5 tubes, just exchange all equipment for T5s.
Items needed:
1 x twin starter unit.
2 x fluorescent light tubes
2 x reflectors
2 x extra light tube clips
2 x plastic tie straps or similar (twisty ties can also be used)
Once all equipment has been purchased make sure they are the correct size and will fit the width of your tank. Plug in the tubes and switch on the unit to make sure that your lights work.
WARNING:::
DO NOT LEAVE THE LIGHTS ON OR LOOK INTO THE LIGHT. This is a fire hazard and could also damage your eyes.
Once you are happy that all is working correctly you are ready to install the light system.
You will have two wires with caps on the ends coming out of each end of the starter unit. Two long and two short wires, the two long wires are used for one tube and the two short wires for the other tube. The long wires need to go to the front of the tank as these are furthest away from the starter unit.
Feed the wires down the back of the tank and rest the unit near the plug you are going to use. DO NOT PLUG IN YET:
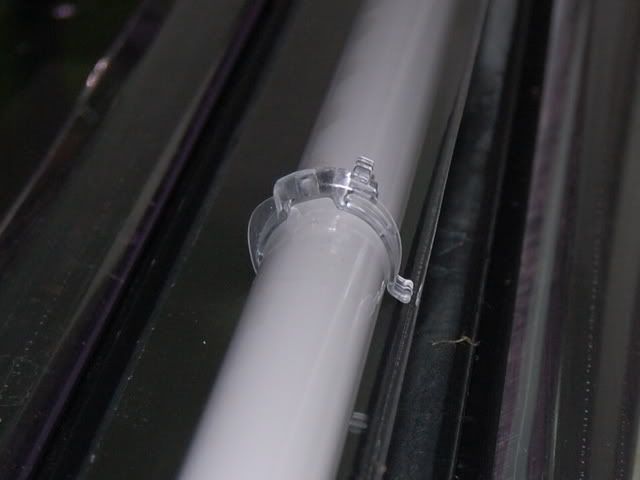
Feed the wires for the front tube under the original “I” bar of the tank, fit the front tube and fit the extra clip in the centre of the tube. This will be adjusted later, and rest the clip on the centre brace bar.
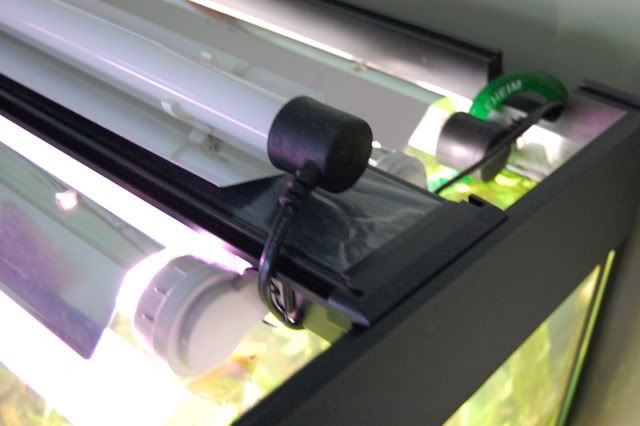
Now leave just a little bit of slack in the wires and strap the wires to the original light holders on either side of the tank, this will help secure the light and also enable the tube to be twisted back on top of the original light unit like a hinge. Like below.
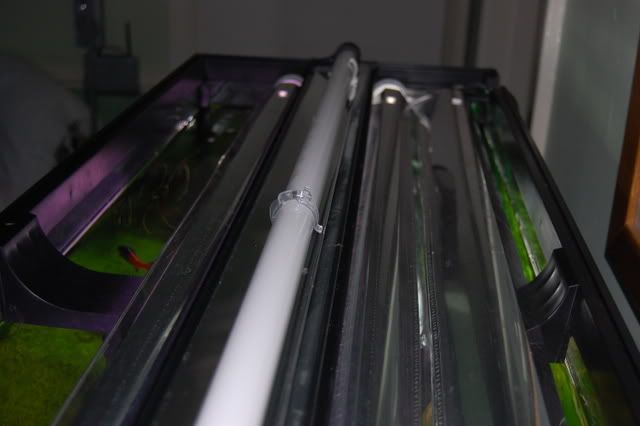
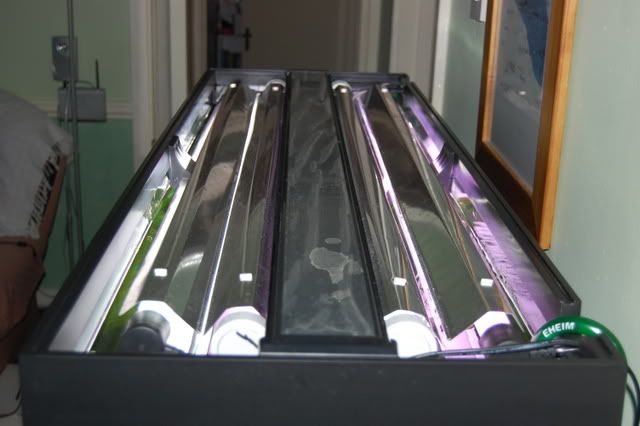
and this is what all four lights together should end up like.
Now fit the rear unit the same way, but leave the wires free so the tube can be completely lifted away from the top of the tank.
Many people are asking how to upgrade their lighting in various tanks. Here I hope to help those who wish to add extra light tubes by showing how I added two extra tubes two my 240. I use the standard jewel I bar (T8s) and two extra T8 tubes and fittings.
This can also be done if you want to use T5 tubes, just exchange all equipment for T5s.
Items needed:
1 x twin starter unit.
2 x fluorescent light tubes
2 x reflectors
2 x extra light tube clips
2 x plastic tie straps or similar (twisty ties can also be used)
Once all equipment has been purchased make sure they are the correct size and will fit the width of your tank. Plug in the tubes and switch on the unit to make sure that your lights work.
WARNING:::
DO NOT LEAVE THE LIGHTS ON OR LOOK INTO THE LIGHT. This is a fire hazard and could also damage your eyes.
Once you are happy that all is working correctly you are ready to install the light system.
You will have two wires with caps on the ends coming out of each end of the starter unit. Two long and two short wires, the two long wires are used for one tube and the two short wires for the other tube. The long wires need to go to the front of the tank as these are furthest away from the starter unit.
Feed the wires down the back of the tank and rest the unit near the plug you are going to use. DO NOT PLUG IN YET:
Feed the wires for the front tube under the original “I” bar of the tank, fit the front tube and fit the extra clip in the centre of the tube. This will be adjusted later, and rest the clip on the centre brace bar.
Now leave just a little bit of slack in the wires and strap the wires to the original light holders on either side of the tank, this will help secure the light and also enable the tube to be twisted back on top of the original light unit like a hinge. Like below.
and this is what all four lights together should end up like.
Now fit the rear unit the same way, but leave the wires free so the tube can be completely lifted away from the top of the tank.